What are visible stand-off sign fixings?
Visible stand-off sign fixings are cleverly designed type of mechanical sign fixing that allows your sign to stand away from the mounting surface.
They are referred to as 'visible', as after installation the cap of the fixings will be observable to the viewer and it is clear that they are fixed by mechanical means and they form part of the overall aesthetics of the sign. Some stand-off fixings are designed to be hidden behind the sign giving an impression that the sign is floating these fittings will be referred to as 'Hidden'.
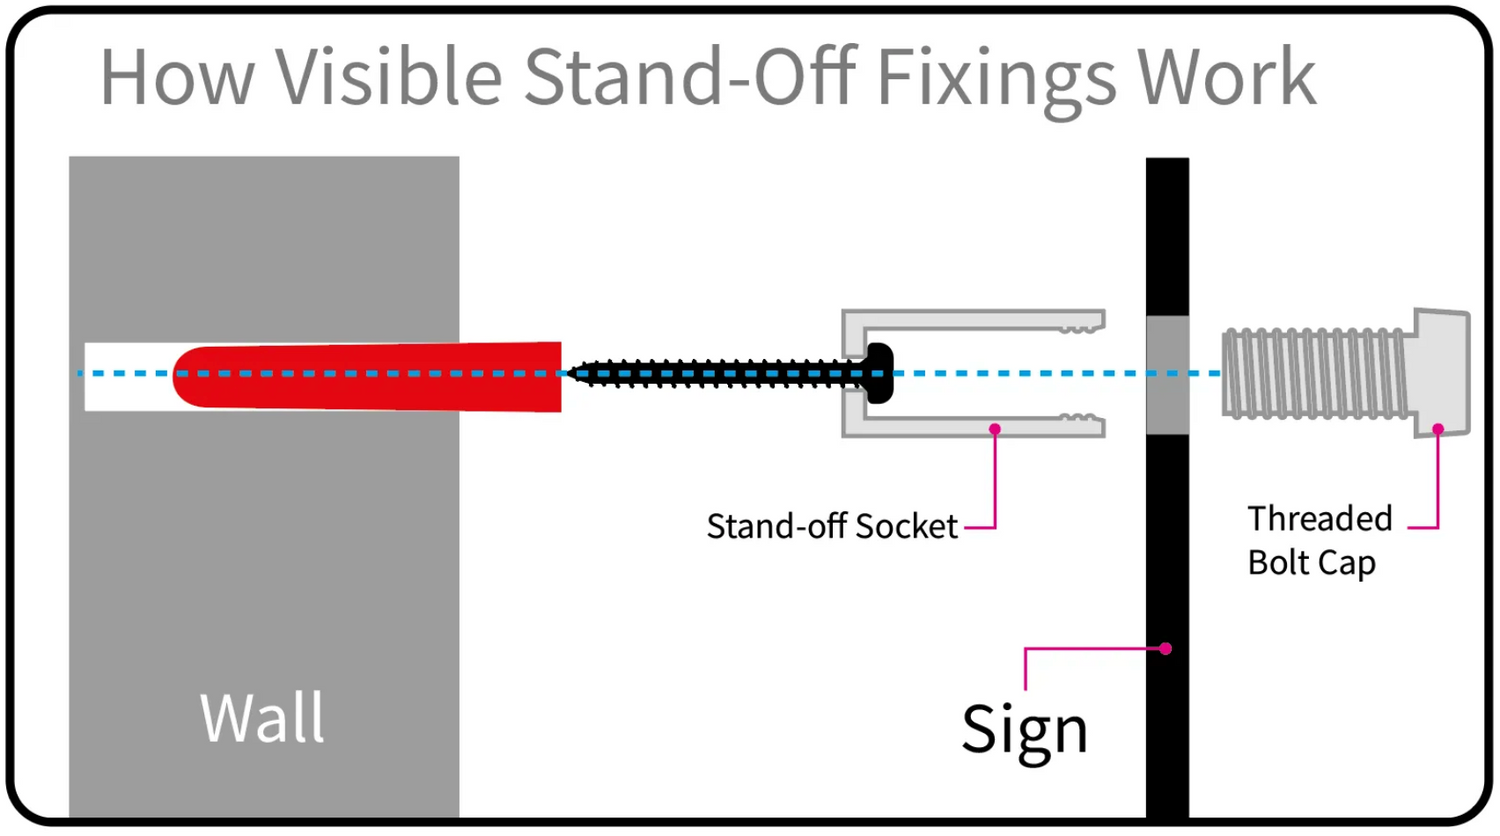
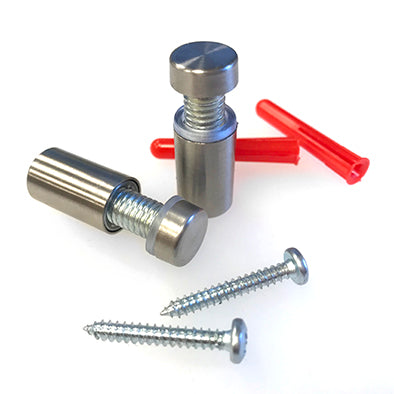
Each fitting comes in two main separable parts; the female socket, & male threaded bolt cap.
Assess the suitability of these fixings for yourself
Sign installation guide using visible stand-off fixings
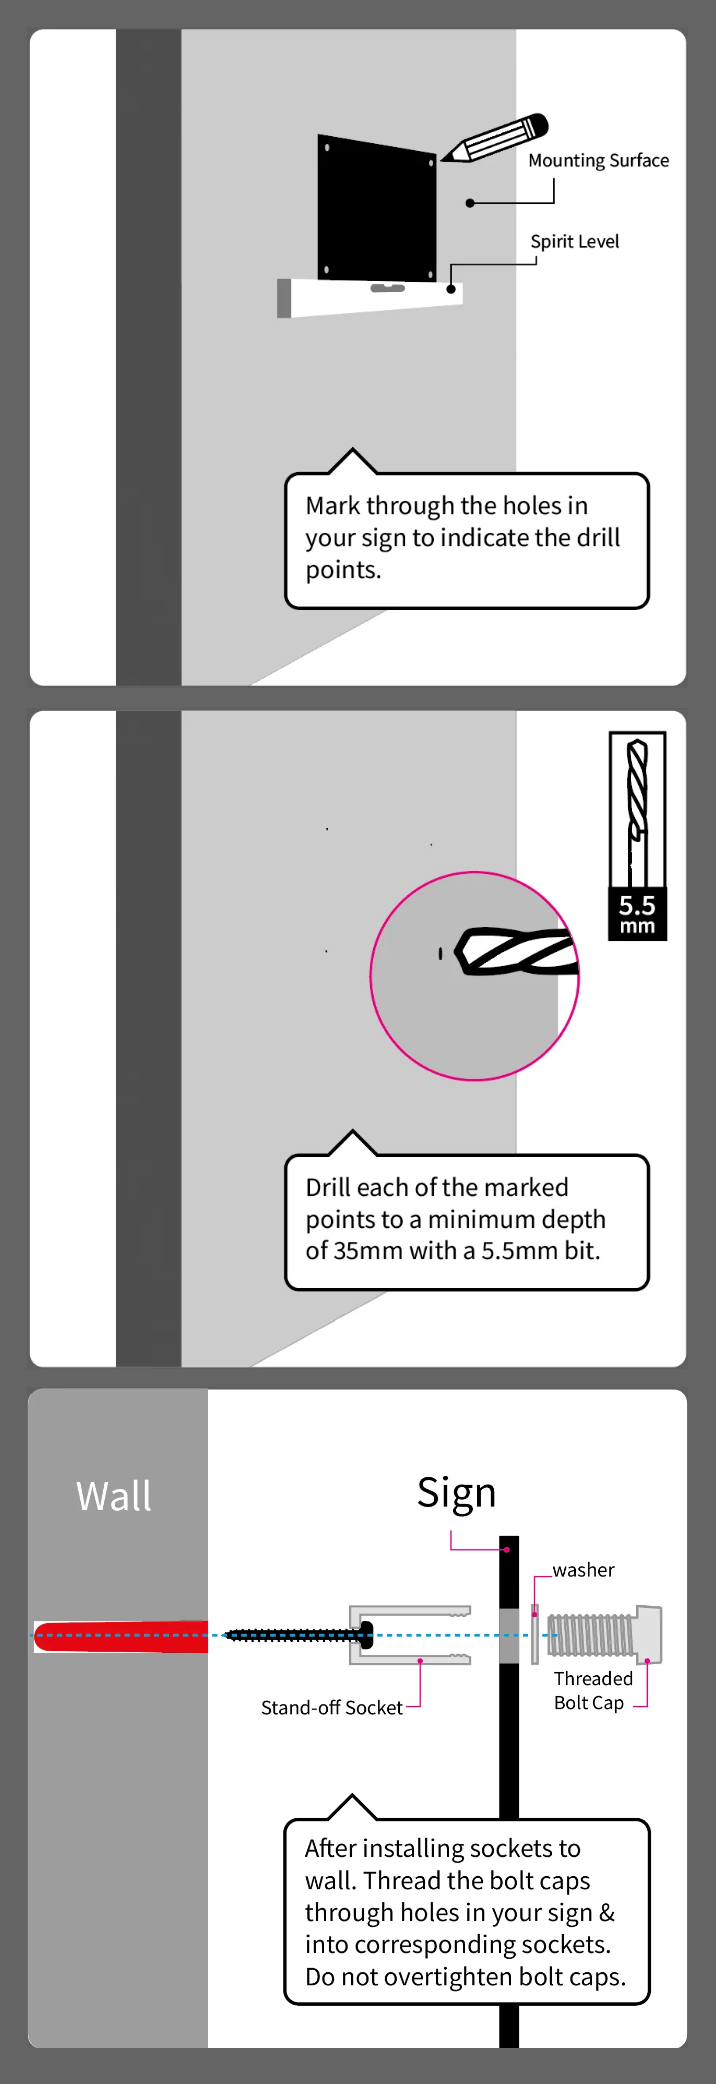
For installation you will need a drill with 5.5mm bit, a posi-drive screwdriver, a spirit level and a pencil to mark your drill holes.
- Hold the spirit level to the surface on which you wish to mount your sign, at the height you would wish the bottom of the sign to sit. Make sure it is level.
- Rest and hold the sign with holes on the spirit level against the mounting surface. Hold the sign absolutely still and remove the spirit level. Mark through the sign holes with your pencil to indicate the centre of the holes, these will be your drill points.
- Drill each of the points you've marked with a 5.5mm drill bit to a minimum depth of 35mm. Insert an expansion plug into each of the holes.
- Thread a screw through each of the sockets and proceed to screw them in to the installed expansion plugs.
- Hold your sign against the installed sockets and align the sockets with the holes in your sign. Rotate a threaded bolt cap into the threaded socket through each of the sign holes. The sign caps only need to be hand-tight, do not over tighten, this may damage your sign.
Note: These instructions are a guide for sign installation on masonry surfaces, for other types of surfaces these instructions may need to be adjusted to suit your wall type. If installing on wood surfaces, the expansion plugs will not be needed.
Our House Signs with Visible Stand-Off Fixings
-
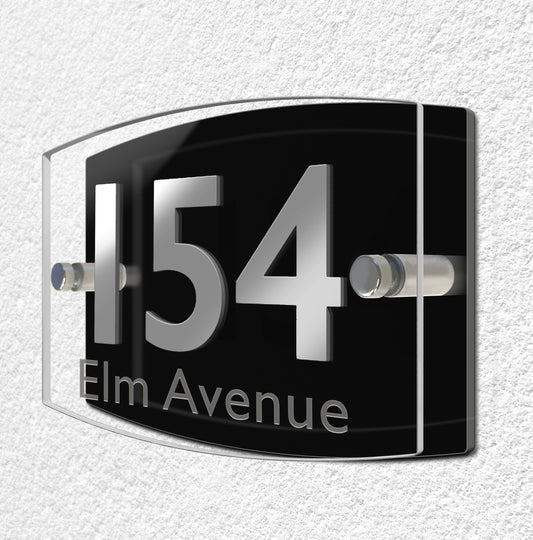
Curva Dual House Number Acrylic Sign with Stainless Steel Stand-Off Fixings
Regular price £22.95 GBPRegular priceUnit price per -
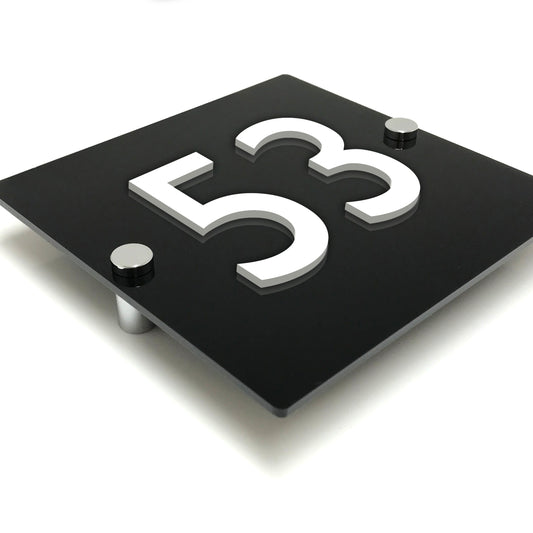
Villamo Gloss Black Acrylic Sign with Raised 3D Numbers
Regular price £15.95 GBPRegular priceUnit price per -
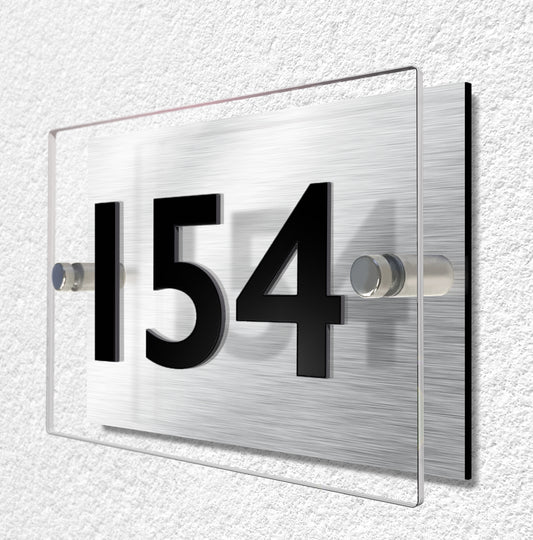
Alumina Dual Brushed Aluminium House Number sign with 3D Numbers & Stand Off Fixings
Regular price £24.95 GBPRegular priceUnit price per -
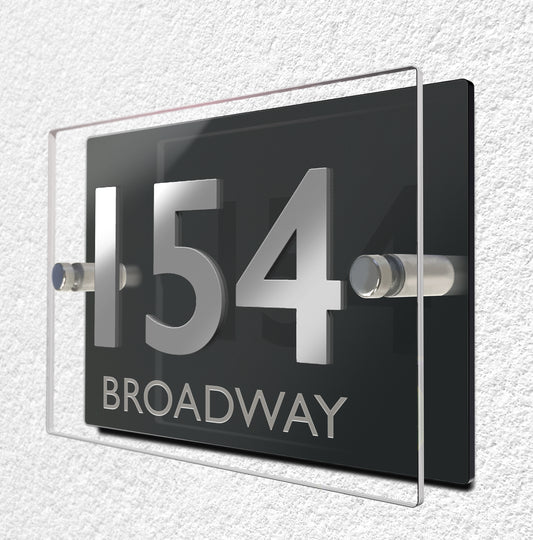
Claro Dual Door Sign with Raised Number & Etched Street Name 15 x 21cm
Regular price £22.95 GBPRegular priceUnit price per